
Technically, I’ve been off for the month of July. In that month off I’ve presented at the 2014 ISTE (International Society for Technology in Education) Conference, the 13th Annual CALSA (California Association of Latino Superintendents and Administrators) Summer Institute, and the 2014 EdTechTeam California Summit. I’ve had a few meetings with colleagues about grants and partnerships we are applying for. I’ve attended a roundtable lunch discussion at Imagine K12. But most importantly, we’ve moved into our first house.
With moving has come many improvement projects, from putting up blinds to creating my own board to attach bills and write notes on.
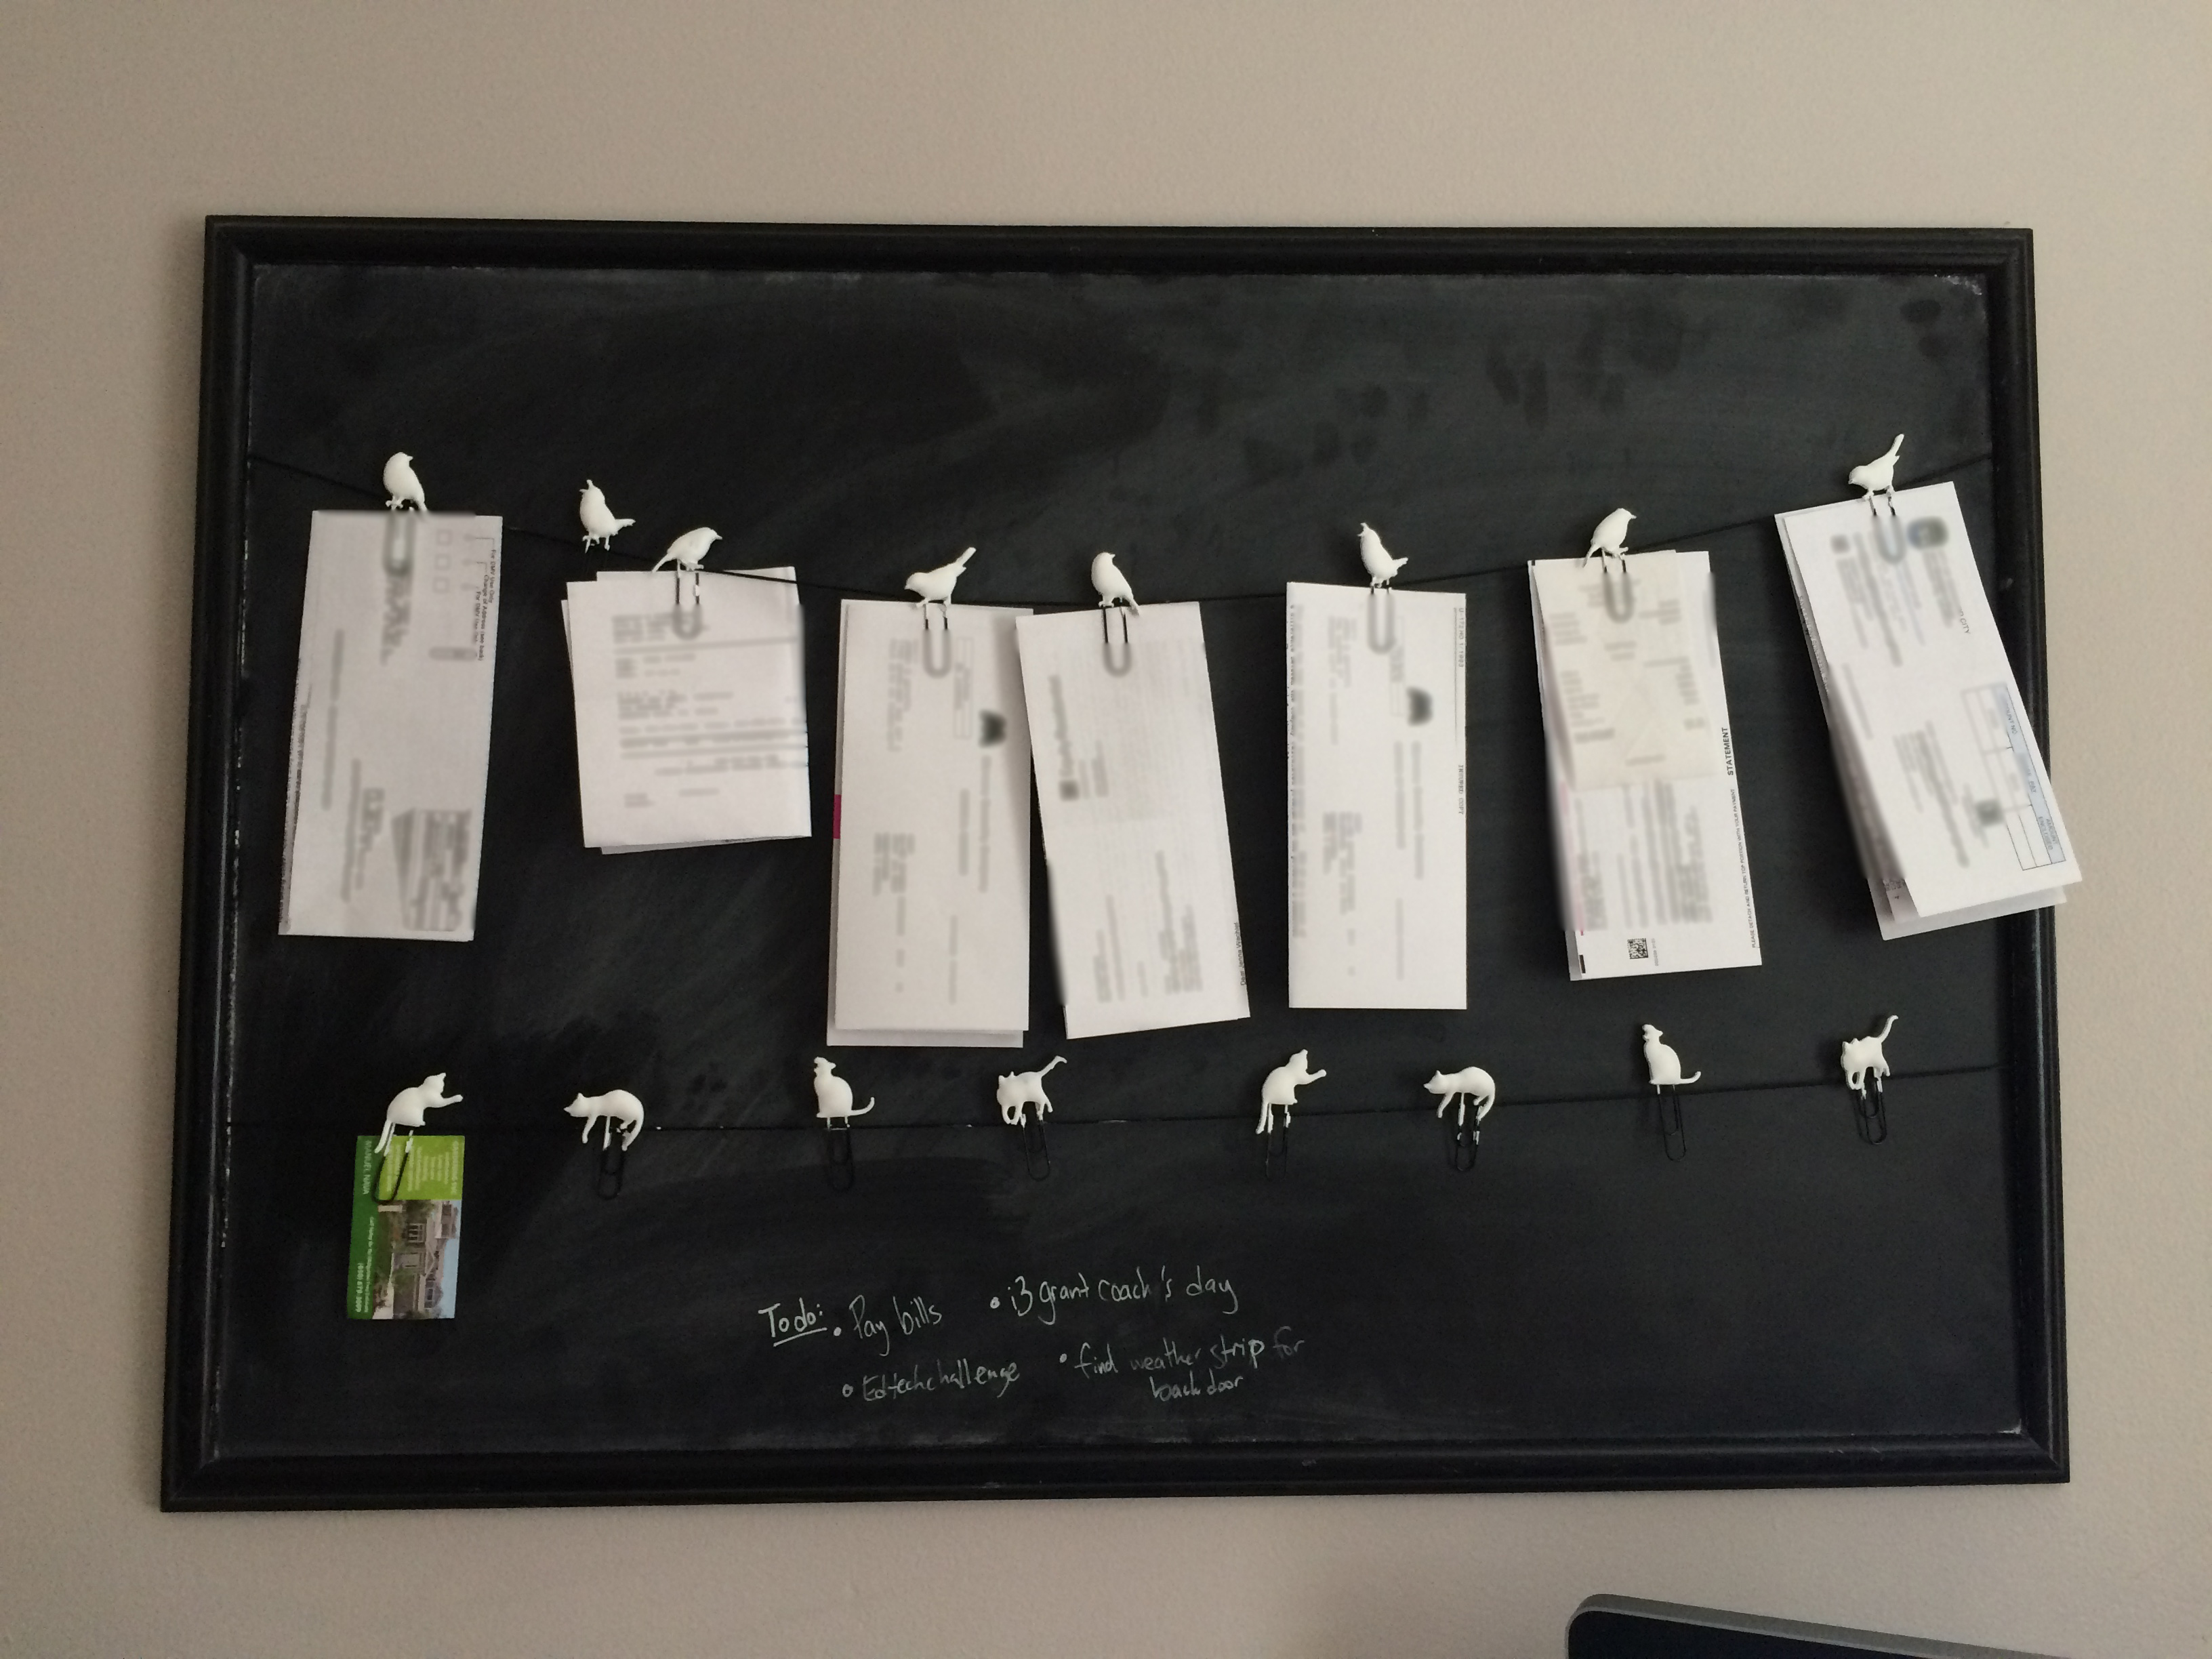
Made from a garage sale frame, a slab of chalkboard from Home Depot, and some neat little cat and bird paperclips.
But the more exciting things have been when I’ve been able to integrate the Internet of Things into our home in useful ways. The latest example? A homemade doorbell that notifies me via sound and SMS.
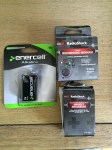
My first attempt at a doorbell occurred yesterday, when I went to Radioshack and picked up these pieces.

I did some splicing, drilling, taping, and recording, before installing my first homemade doorbell.
-
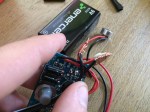
- Splicing
-

- Recording
-
- Drilling
-

- Taping
As you can see in the video, the project worked, but was going to be quite an eyesore to visitors, and probably even more so for Jenna and me whenever we came home.
-
- Outside
-

- Inside
It was a good attempt, but not something I’d love to have permanently attached to the door. But, proof that we could have a custom doorbell that could play something we chose.
In trying to make a more robust doorbell, I pulled out the littleBits. I have littleBits in my home right now from three different places: kits from our Makerspace, kits that were gifted to me by Kevin Carroll (another great story), and the cloudBit that I was sent in order to create a project before they officially announced the module. At this point, I had already failed at meeting the July 4th deadline for the cloudBit work and I didn’t really have a novel idea for it at the time.
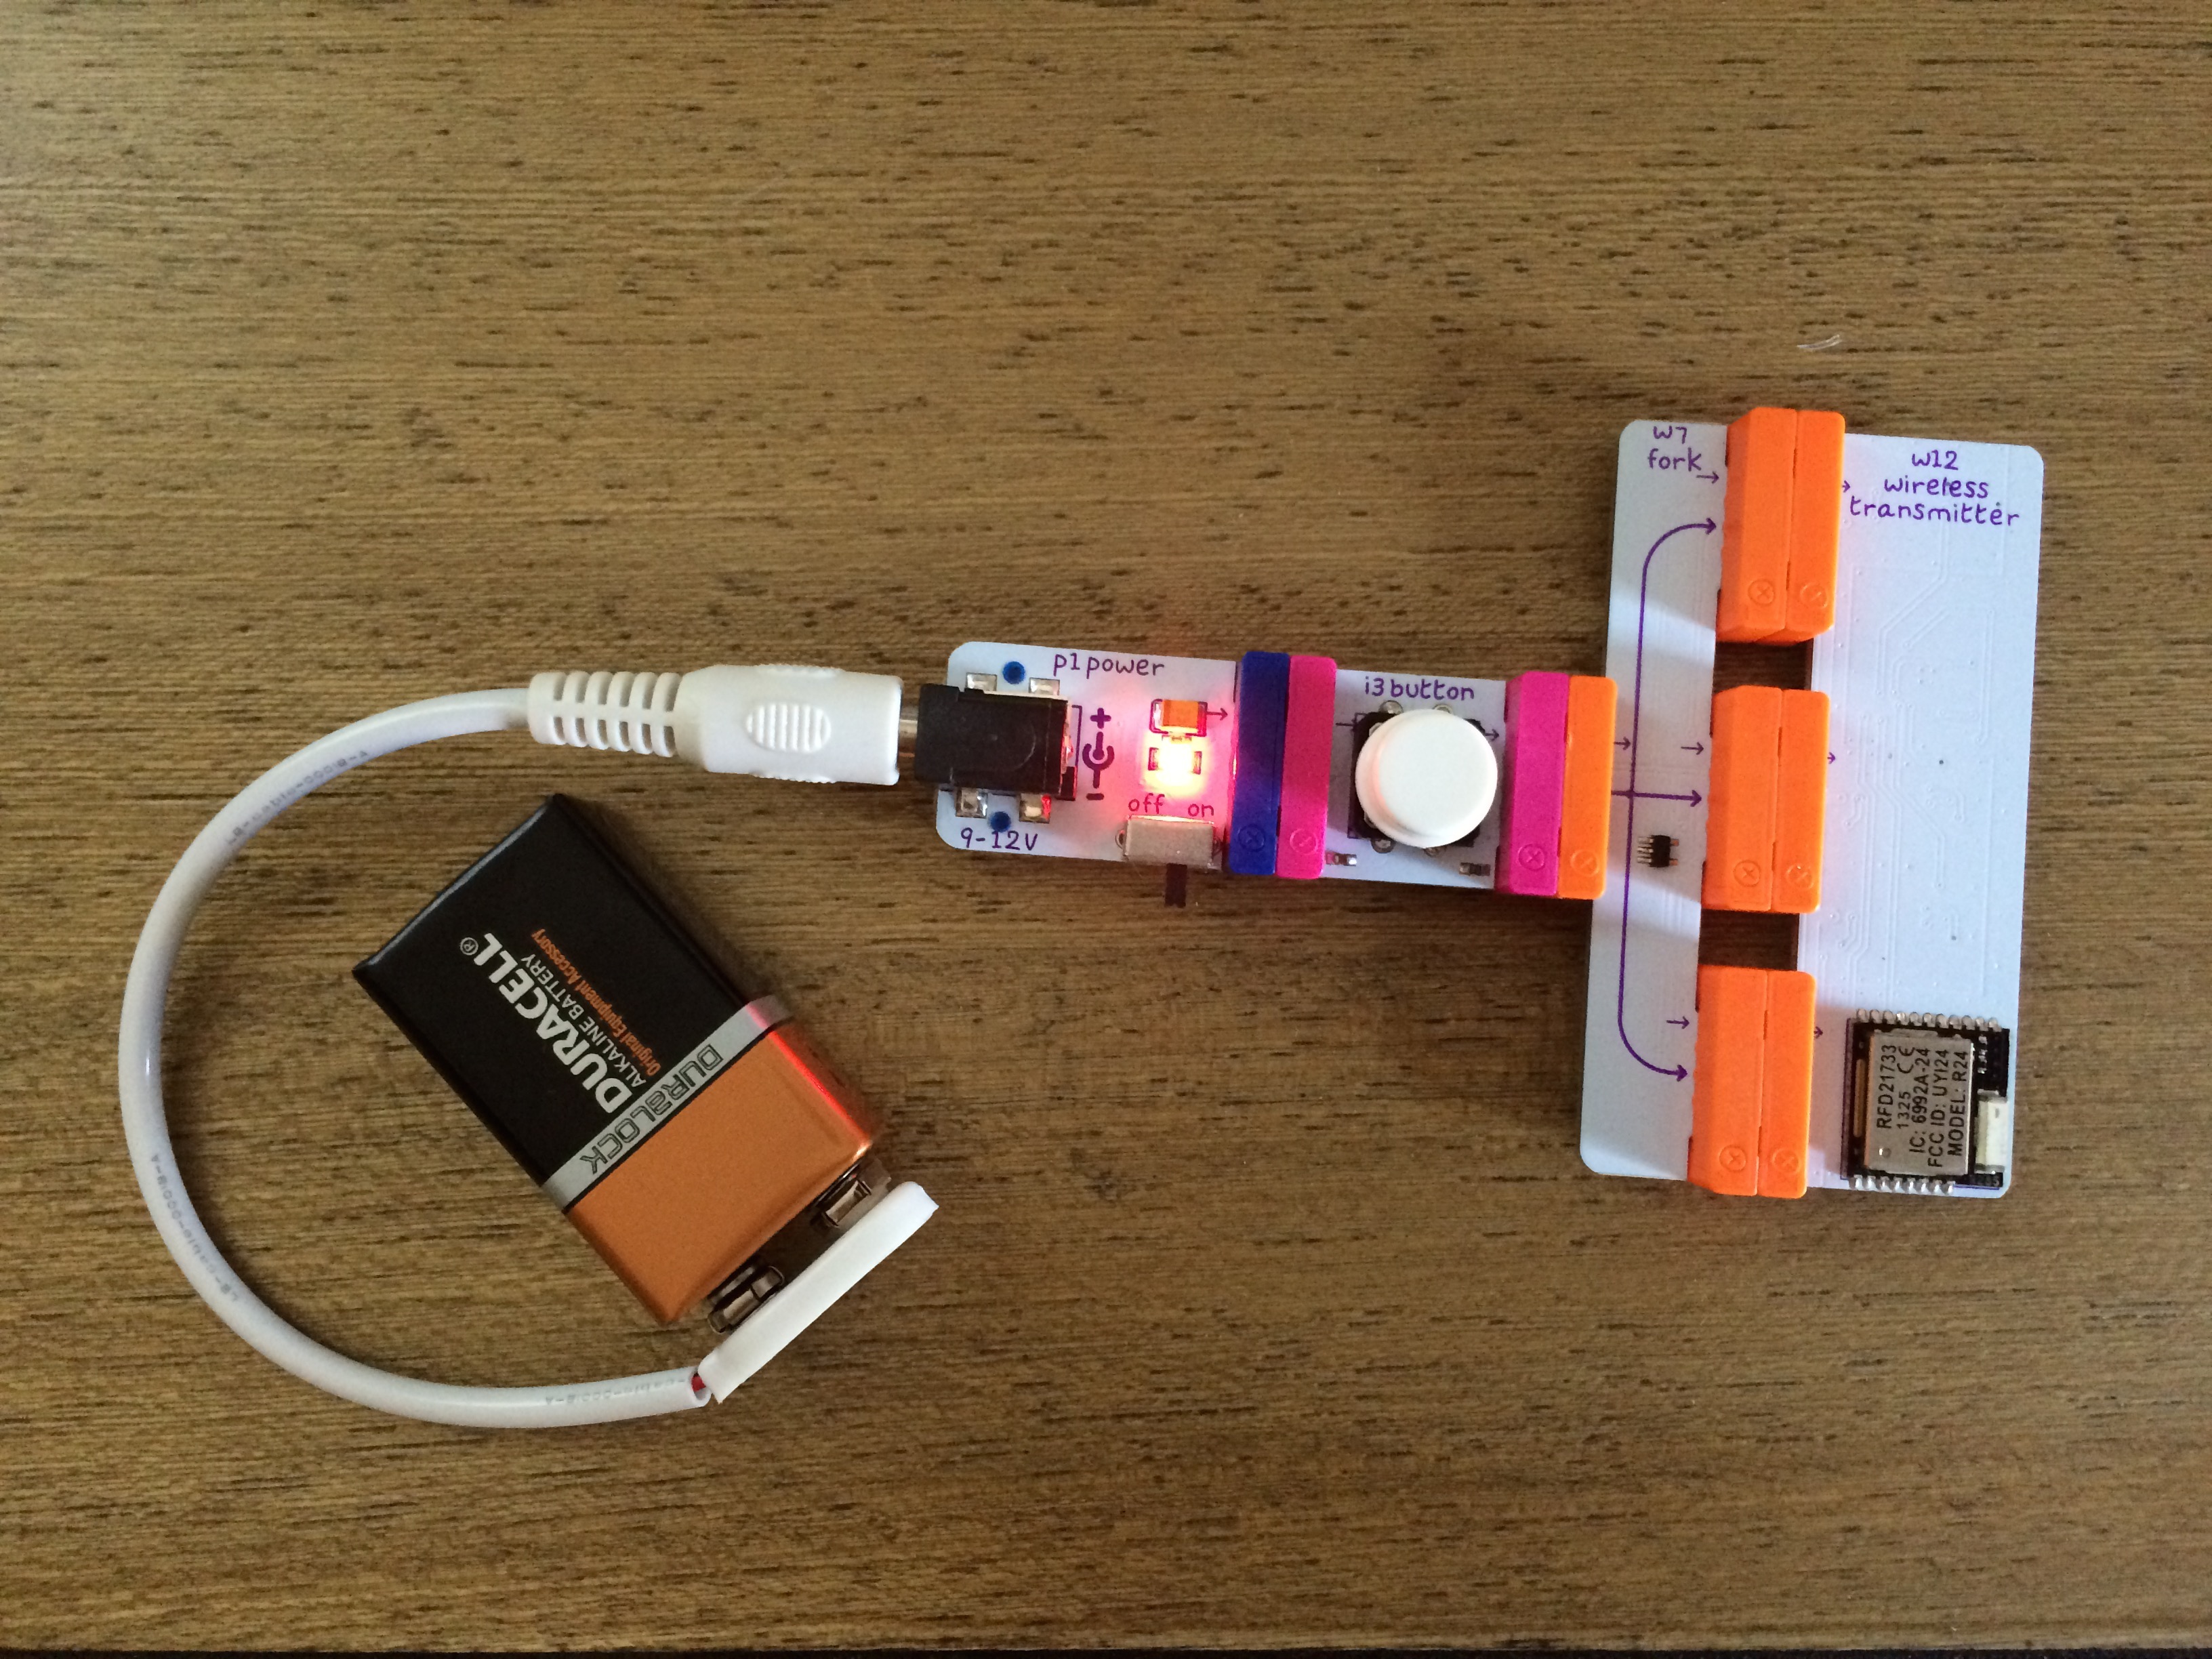
In pulling out the littleBits, the first thing I wanted to do was see if I could create a doorbell using the wireless transmitter/receiver combination. I put the power, button and wireless transmitter on one side and the power, receiver, and buzzer on the other side. Success!
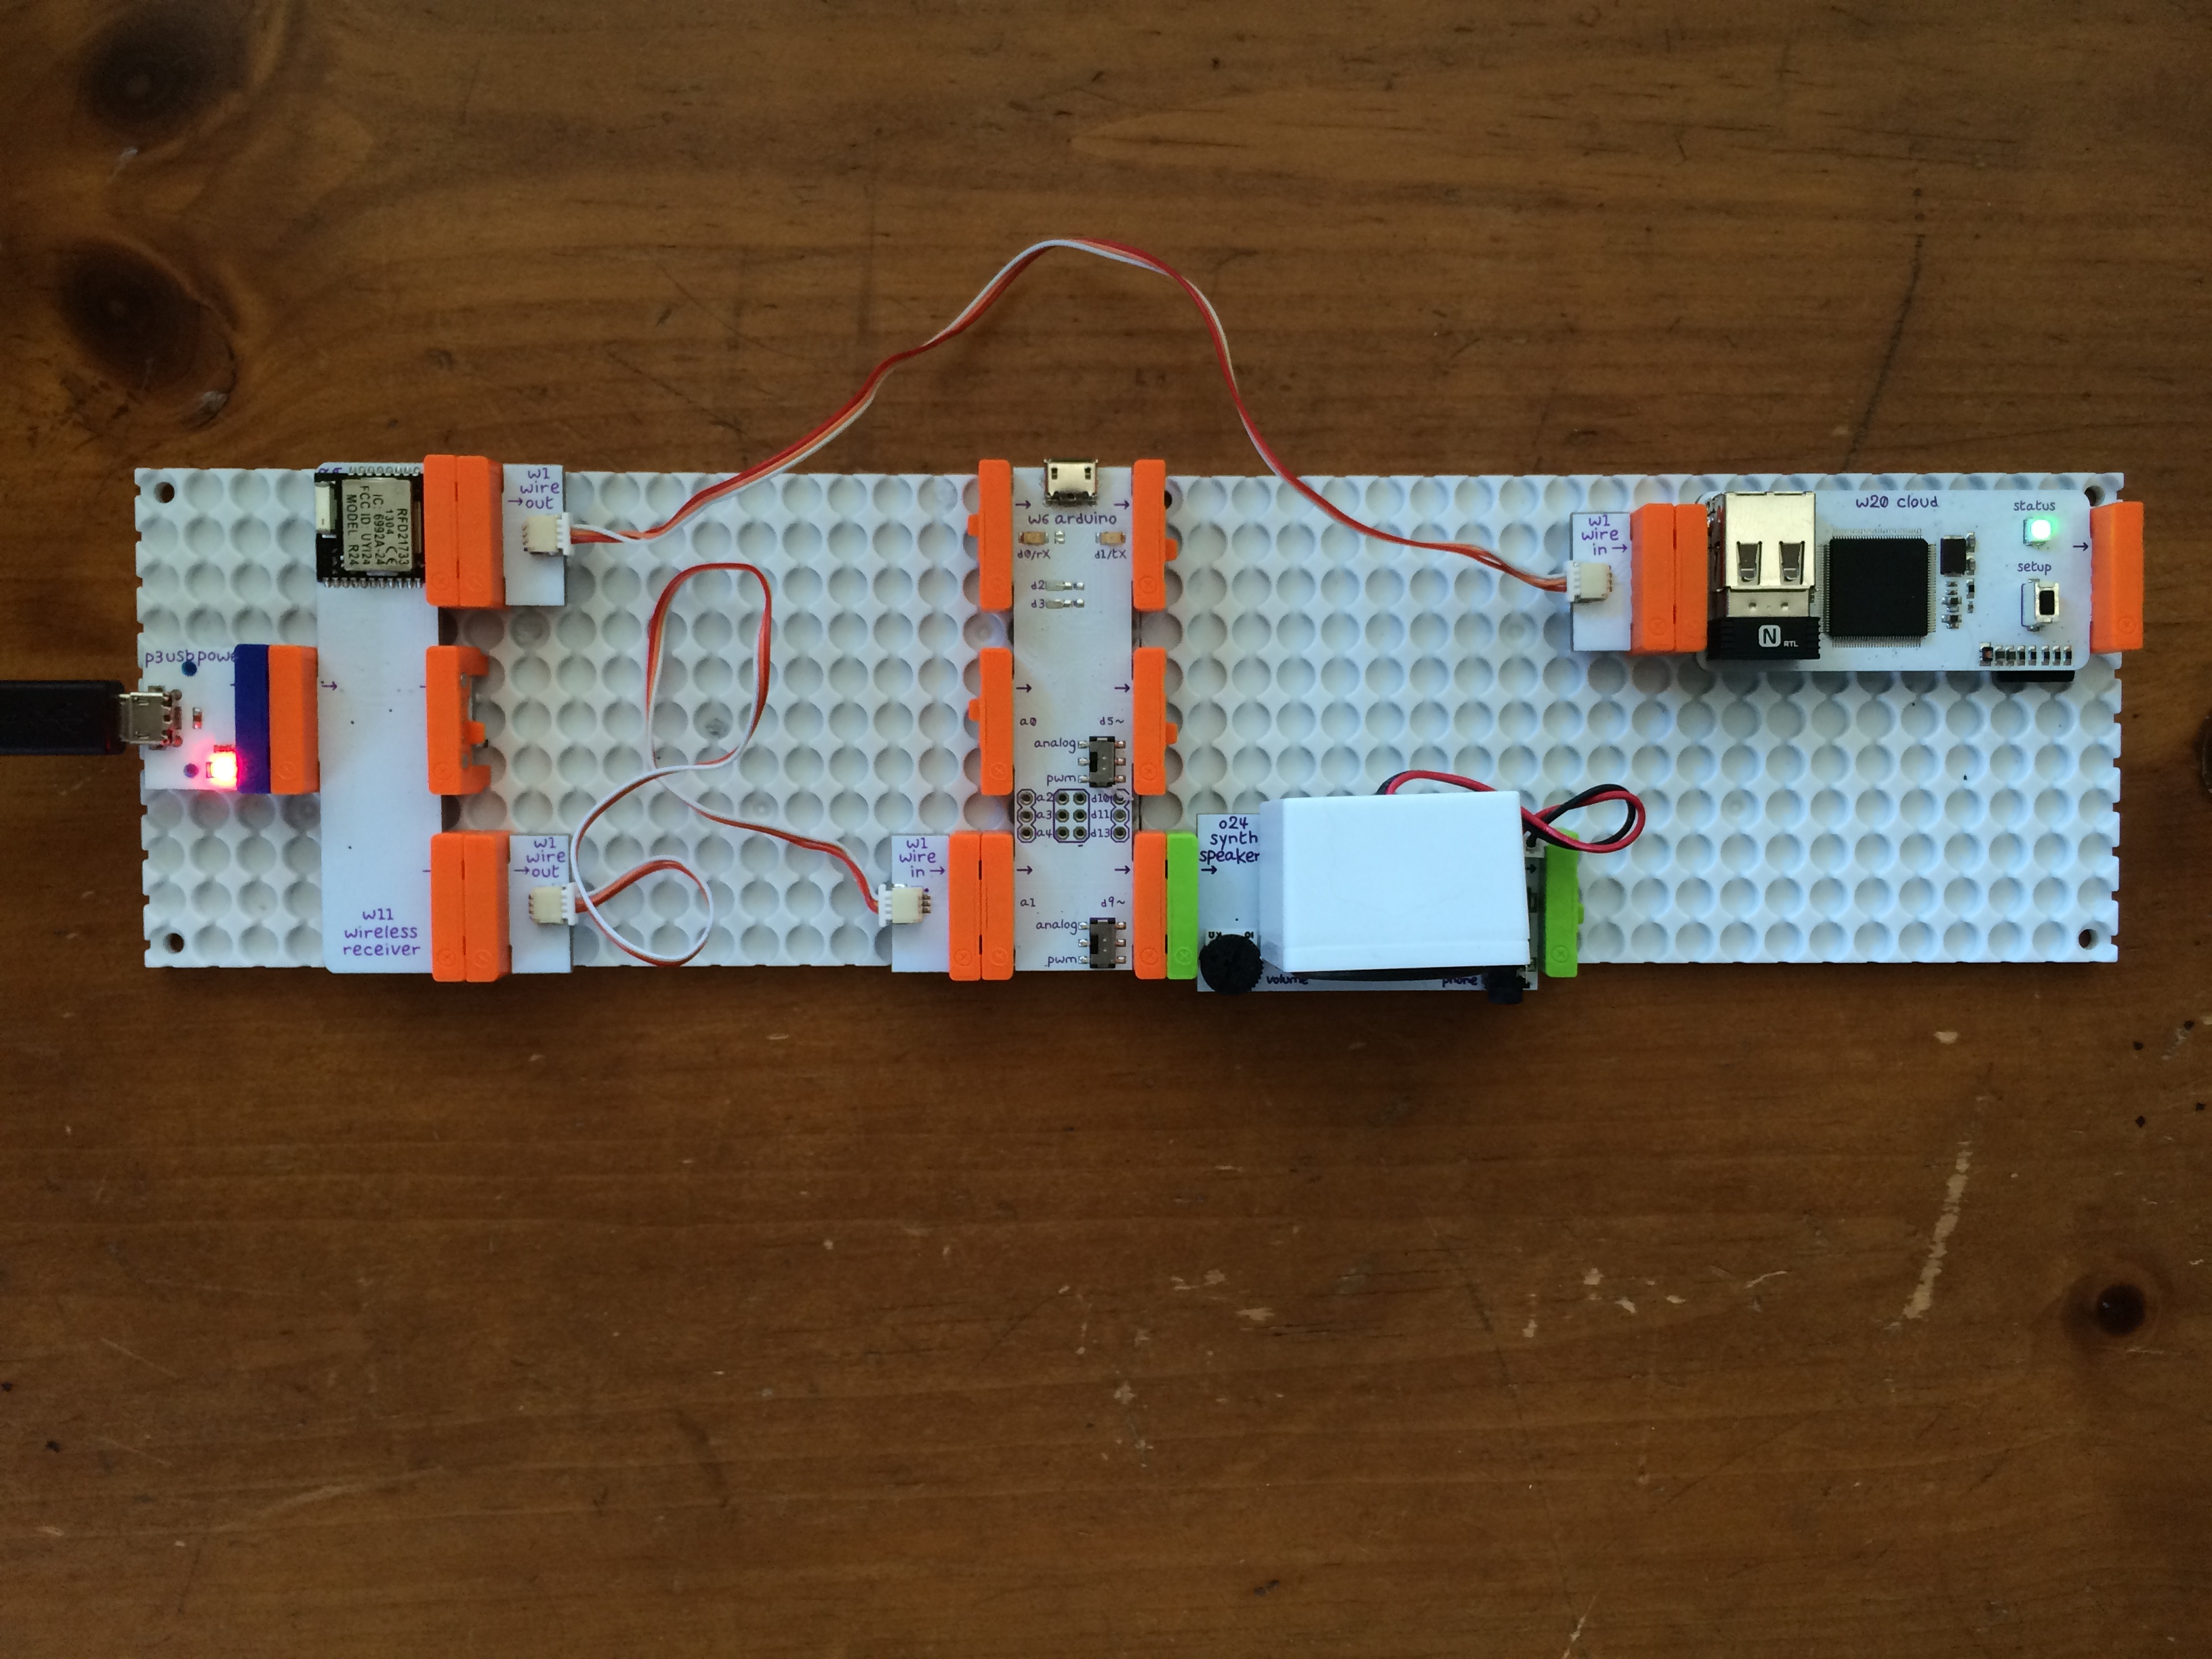
Next, I wanted to see if I could play my own tone, so I added the Arduino module (which I bought at Maker Faire) and programmed my first Arduino project. Okay, so I took the littleBits Play A Melody project, copied the Marios Bros tune from another Arduino project (I had to change octaves a little bit… NOTE_C7 became NOTE_C4 and so on), and learned how to play the melody once rather than a loop (although you’ll notice later that I still have it playing twice rather than once).
I uploaded the code to the littleBits Arduino piece and – ta-da! – the Mario theme song played every time I pressed the button! I was one step closer to my doorbell dreams.
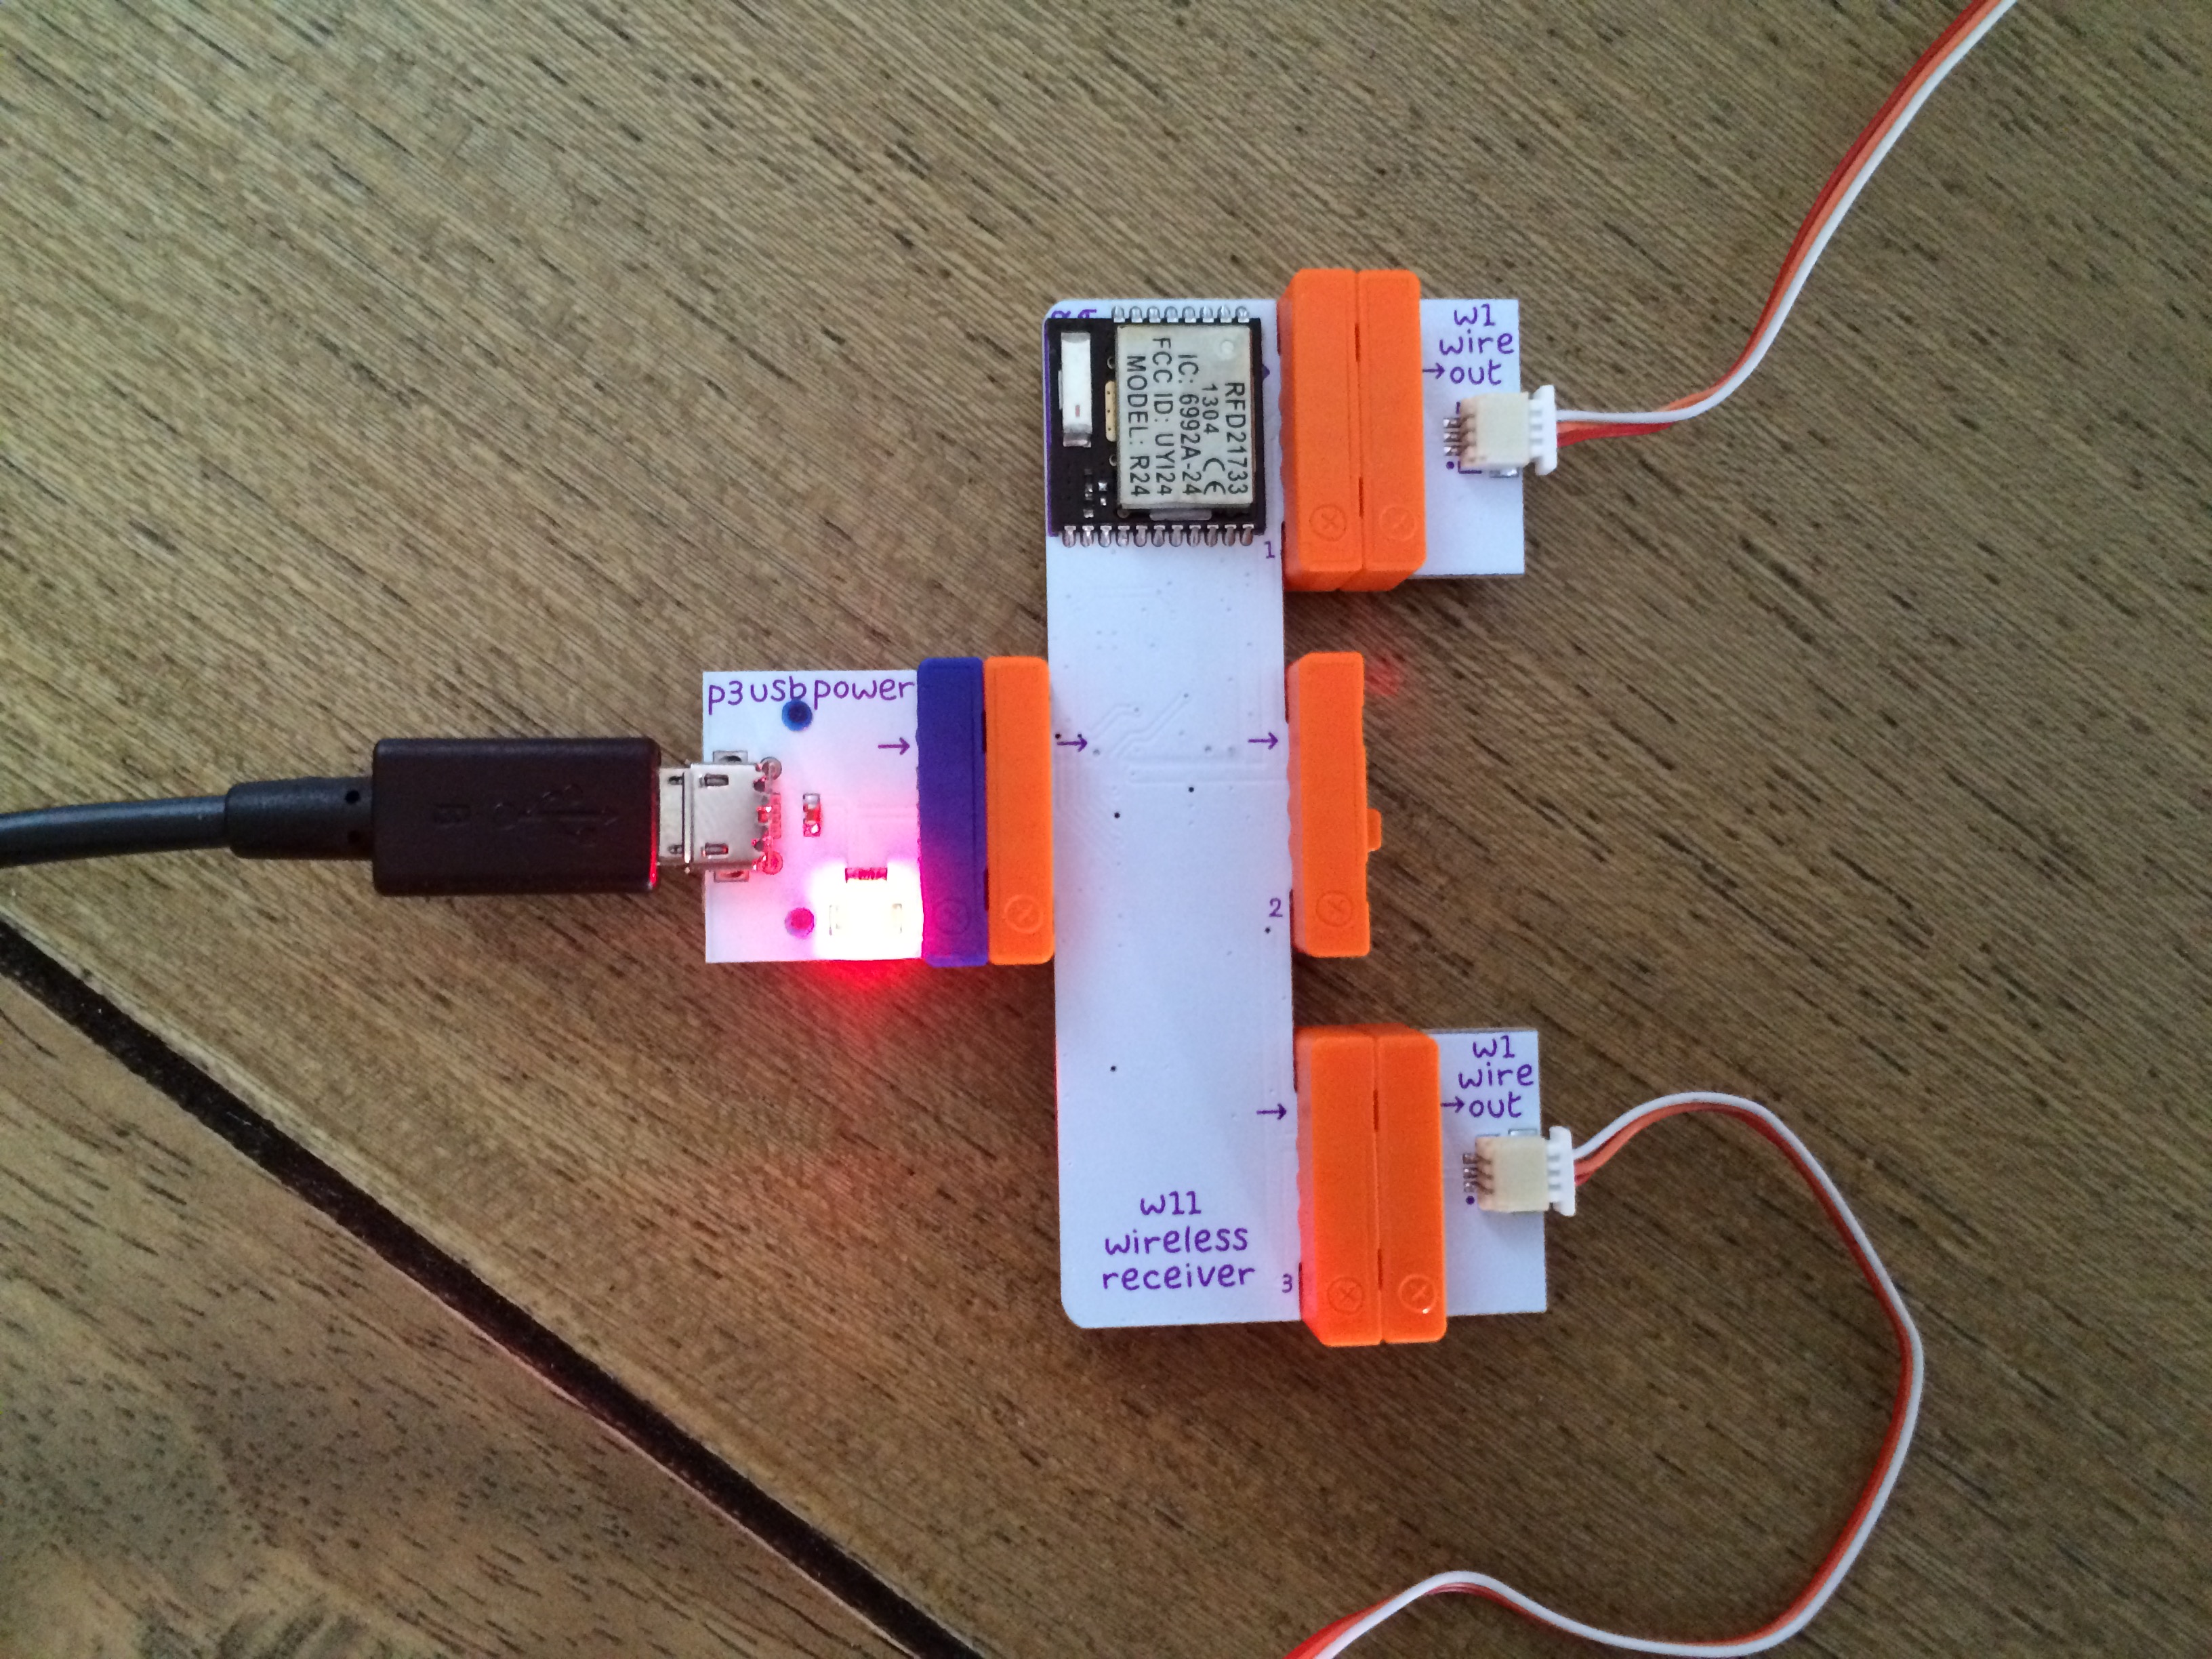
Wireless Receiver

Arduino and Speaker
That’s when I realized that I could not only have the doorbell play a song in the house, but using the cloudBit and IFTTT I could receive a text message to my phone when the doorbell rang as well. That could be especially beneficial if we’re in the backyard or have the TV turned up too loud. I went onto IFTTT and created a recipe that would trigger an SMS every time the button was pressed and sent a signal to the cloudBit.
Success! Well, okay, failure after failure did happen in between each success, but eventually I got there.
Indoor doorbell pieces
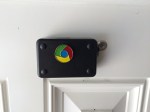
Once I had this all programmed and set up, it was time to go to Home Depot to find the right enclosure for the littleBits. I wanted something that people could see the littleBits, but not steal them, so I bought a TayMac slim waterproof outlet enclosure, which I drilled a hole into so I could lock the littleBits inside. I also drilled a hole into the front to allow the user to press the doorbell. I went outside and mounted the doorbell next to the door.

Doorbell locked up and mounted
With the doorbell mounted, I plugged in the indoor pieces and went outside to test. (Apologies for the vertical filming, but I wanted to film in a way that showed that I actually got the doorbell to work.)
And as you can see from the screenshot below, the cloudBit worked too, sending me texts each time the doorbell has been pressed.

IFTTT & littleBits Cloud = Doorbell Notifications!
Now that I’ve made the doorbell I’d envisioned, I only have two more problems to tackle:
1) How do I get sustaining power out to the doorbell in a way that doesn’t cost a significant amount of money? The current power comes from the littleBits coin battery and doesn’t last long enough to power it beyond an afternoon at most.
2) How do I program a song that my wife Jenna will find more appealing than the Super Mario Bros theme song? 😉

Love this (obviously) and love the idea of a new theme song =)